Today I'll be setting up R77.30 on UNetLab. The idea being that it will be much easier to create labs.
Whilst the mixture of UNetLab and Qemu goes great for the most part, because we need to partly install the GAIA operating system BEFORE moving it to UNetLab, this is slightly more tricky.
We start off by setting up a new VM in VirtualBox, with 20GB disk space, 2048Mb memory and one CPU. I have set it to boot from the ISO disk.
It starts to boot:
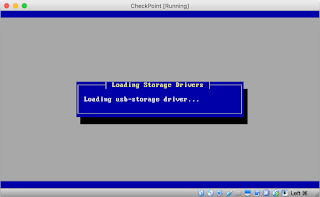

We set the management interface:


Installation continues:

And finishes:

Once it starts to reboot, shut down the VM, and then we can export it to OVA:

Once it has exported, copy the resulting OVA file to the UNetLab machine, preferably to a folder called "cpsg-77-30", and follow the steps below:
Our topology looks like this:

Before we do anything, we should change the IP address (to 10.1.1.111 to follow the CBT Nuggets CCSA videos), which we should be able to do via telnet:


We connect using Internet Explorer, and start the configuration wizard:


A quick reboot later and we can log back in:

We grab the SmartConsole download.

Remember to install the MSVCR100 files before installing the SmartConsole stuff. Otherwise it won't work. The problem is that the Windows VM is not connected to the Internet, nor does it already have it installed. So, we have to download the 32-Bit version and copy it to the /tmp folder of the UNL box. We can then create an ISO file:
Setting up the SMS server is pretty similar to all the above steps, but we should find that we cannot access the HQ-FW (by icmp, or via the SmartConsole), because it is a Security Gateway (SG), so we need to access it through the SMS, we'll be needing the SIC activation key we set up during the SG installation. We can add it by right-clicking on "Check Point" and selecting "Security Gateway/Management":


Looks good:

Whilst the mixture of UNetLab and Qemu goes great for the most part, because we need to partly install the GAIA operating system BEFORE moving it to UNetLab, this is slightly more tricky.
We start off by setting up a new VM in VirtualBox, with 20GB disk space, 2048Mb memory and one CPU. I have set it to boot from the ISO disk.
It starts to boot:


We set the management interface:

Then set the IP address information:

Installation continues:

And finishes:

Once it starts to reboot, shut down the VM, and then we can export it to OVA:

Once it has exported, copy the resulting OVA file to the UNetLab machine, preferably to a folder called "cpsg-77-30", and follow the steps below:
Stuarts-MacBook-Pro:~ stuart$ ssh root@192.168.0.16
root@192.168.0.16's password:
Welcome to Ubuntu 14.04.3 LTS (GNU/Linux 3.16.7-ckt8-unetlab x86_64)

 * Documentation:  https://help.ubuntu.com/
Last login: Thu Feb 18 10:20:11 2016 from 192.168.0.35
root@unl01:~# cd /opt/unetlab/addons/qemu/cpsg-R77-30/
root@unl01:/opt/unetlab/addons/qemu/cpsg-R77-30# ls
CheckPoint-77-30.ova
root@unl01:/opt/unetlab/addons/qemu/cpsg-R77-30# tar -xf CheckPoint-77-30.ova
root@unl01:/opt/unetlab/addons/qemu/cpsg-R77-30# ls
CheckPoint-77-30.ova  CheckPoint-77-30.ovf  CheckPoint-disk1.vmdk
root@unl01:/opt/unetlab/addons/qemu/cpsg-R77-30# /opt/qemu/bin/qemu-img convert -f vmdk -O qcow2 CheckPoint-disk1.vmdk hda.qcow2
root@unl01:/opt/unetlab/addons/qemu/cpsg-R77-30# ls
CheckPoint-77-30.ova  CheckPoint-77-30.ovf  CheckPoint-disk1.vmdk  hda.qcow2
root@unl01:/opt/unetlab/addons/qemu/cpsg-R77-30# rm -f CheckPoint-*
root@unl01:/opt/unetlab/addons/qemu/cpsg-R77-30# ls
hda.qcow2
root@unl01:/opt/unetlab/addons/qemu/cpsg-R77-30#
root@unl01:/opt/unetlab/addons/qemu/cpsg-R77-30# /opt/unetlab/wrappers/unl_wrapper -a fixpermissions
root@unl01:/opt/unetlab/addons/qemu/cpsg-R77-30#
Our topology looks like this:

Before we do anything, we should change the IP address (to 10.1.1.111 to follow the CBT Nuggets CCSA videos), which we should be able to do via telnet:


gw-010000> set interface eth0 ipv4-address 10.1.1.111 mask-length 24
gw-010000>
gw-010000> set interface eth1 state on
gw-010000>
Now we can press ahead and start configuring the HQ-FW, as we can reach it from the Win box:

We connect using Internet Explorer, and start the configuration wizard:


A quick reboot later and we can log back in:

We grab the SmartConsole download.

Remember to install the MSVCR100 files before installing the SmartConsole stuff. Otherwise it won't work. The problem is that the Windows VM is not connected to the Internet, nor does it already have it installed. So, we have to download the 32-Bit version and copy it to the /tmp folder of the UNL box. We can then create an ISO file:
root@unl01:/opt/unetlab/addons/qemu/linux-lamp# mkisofs -o /opt/unetlab/addons/qemu/win-7-Pro/cdrom.iso /tmp/
I: -input-charset not specified, using utf-8 (detected in locale settings)
Total translation table size: 0
Total rockridge attributes bytes: 0
Total directory bytes: 116
Path table size(bytes): 10
Max brk space used 0
4564 extents written (8 MB)
root@unl01:/opt/unetlab/addons/qemu/linux-lamp#
We do then need to stop all the nodes, and start them so that the Windows box picks up the cdrom.iso file. We then just access the CDROM drive, and install the exe file, then install the SmartConsole stuff.
Setting up the SMS server is pretty similar to all the above steps, but we should find that we cannot access the HQ-FW (by icmp, or via the SmartConsole), because it is a Security Gateway (SG), so we need to access it through the SMS, we'll be needing the SIC activation key we set up during the SG installation. We can add it by right-clicking on "Check Point" and selecting "Security Gateway/Management":


Looks good:

Tomorrow we'll set up the Branch-FW, and start to look at how to actually make a network.

